
It’s always fun to make your gift stand out in a pile of presents at a birthday party. Here we’ve used stickers to decorate some gift wrap and added stickers as a topper too – definitely a sneaky trick to make sure it’s the first one the recipient goes for! You can go in loads of different directions with this depending on the stickers and supplied you have on hand. If you can choose a color scheme (brights, pastels, blues, etc) it will be tough to go wrong.

MATERIALS:
Stickers!
White paper roll / newsprint / extra large sheet of paper (medium weight works best)
Paint (we used tempra but you could do acrylic or watercolor)
Paint roller
Scissors
Yarn or ribbon
Extras (we used feathers and stickers but you could use pom poms, gift tags, etc)
DIRECTIONS:
1. Roll the paper out to be 1.5x the size you’ll need to wrap your gift – measure twice, cut once! Secure the ends with a bit of tape or weight it down with something.

2. Paint! It’s easiest to handle the paper once it’s dry if you don’t cover the whole sheet with paint. Leaving some white spots makes it look a bit more abstract – we worked on trying to make long straight rolls. Let it dry for 1-2 hours.
3. Carefully wrap package. With extra paper, you’ll be able to ensure the “best” part of the paper pattern is front and center on the top of the gift.
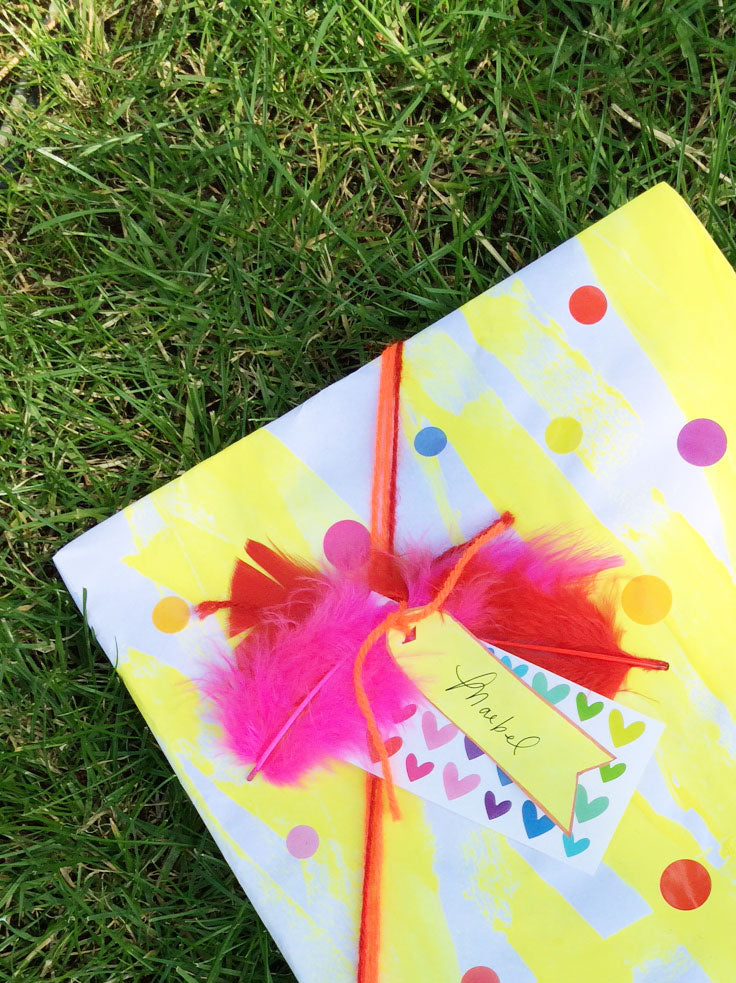
4. Stick stickers on the gift. If you’re having small kids do this, you could take a pen and draw random dots on the paper, having them stick stickers only on the dots.
5. Tie your ribbon or yarn in a knot around the stickered gift.
6. Cut or punch a small hole in a sticker sheet to tie into the ribbon. We also used some of the leftover painted paper to cut out a gift tag.
7. Tie feathers and other exciting things with the ribbon, leaving the gift tag on top. Secure with a loose knot so you don’t rip the sticker sheet.
8. Go make someone’s day!
